You have two options when it comes to resending products to customers.
Option One: Manually processing the new item(s) and sending the customer a note about their new order- This is useful for when you don’t keep track of inventory in your store and don’t need to worry about creating a new shipping label on the backend of your site.
Option Two: Create a new, manual order on your website – This option comes in handy when you need to keep track of inventory on your website, and it will allow you to create a new shipping label from the backend of your website (if you are utilizing either of these functionalities)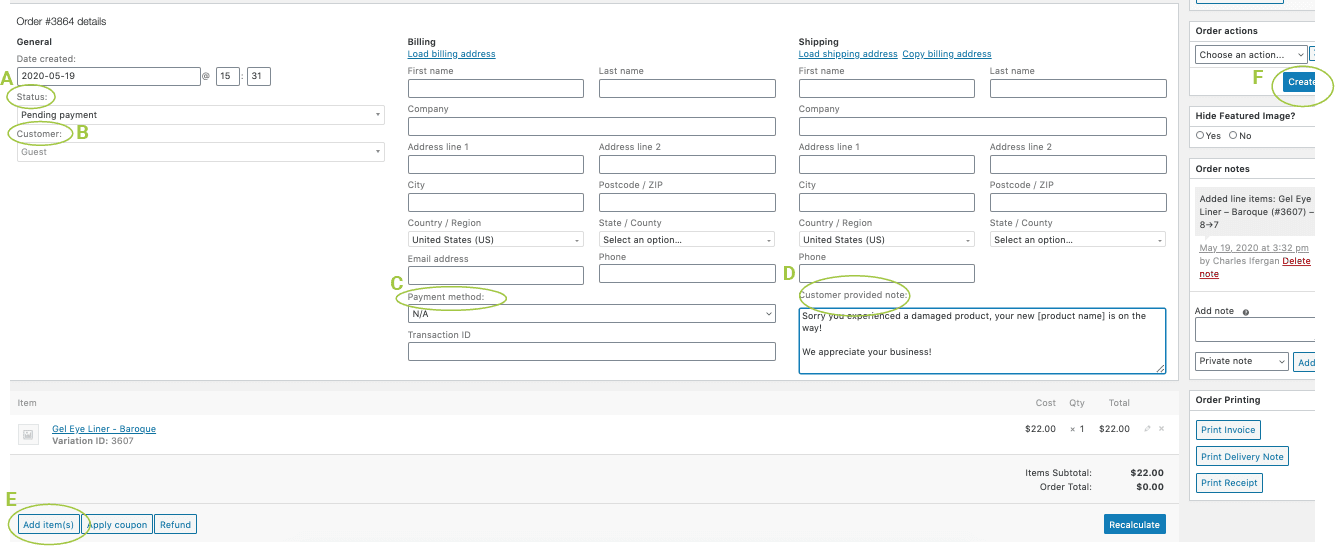
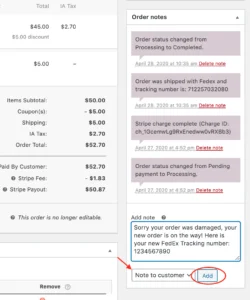
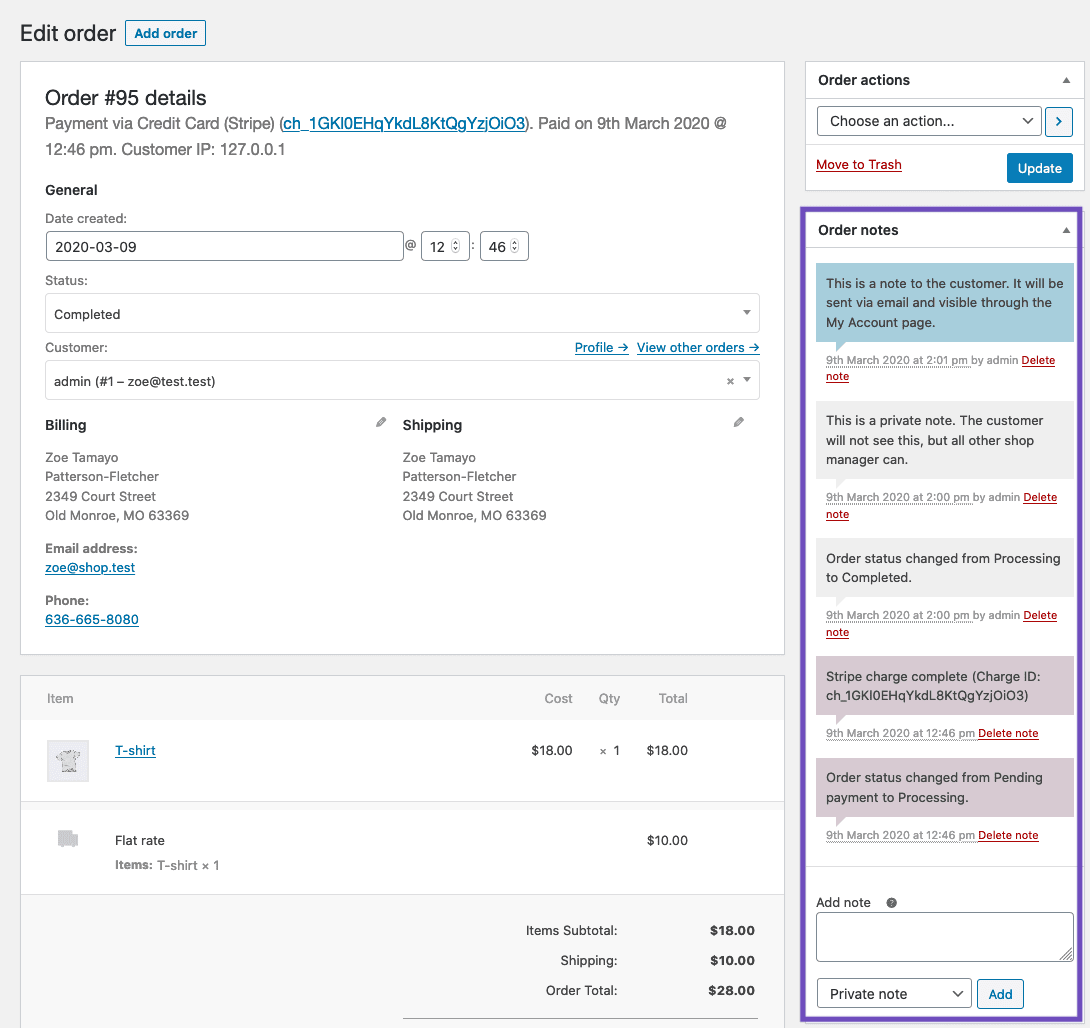
Order notes are useful for keeping track of a variety of things on individual orders. Use private notes to keep track of internal matters, and use customer notes to keep your customers updated on their order. You may also notice notes from your payment gateway when charges are complete, or an order fails. Notes will be color coded so you can tell what the note is from, and who was notified:
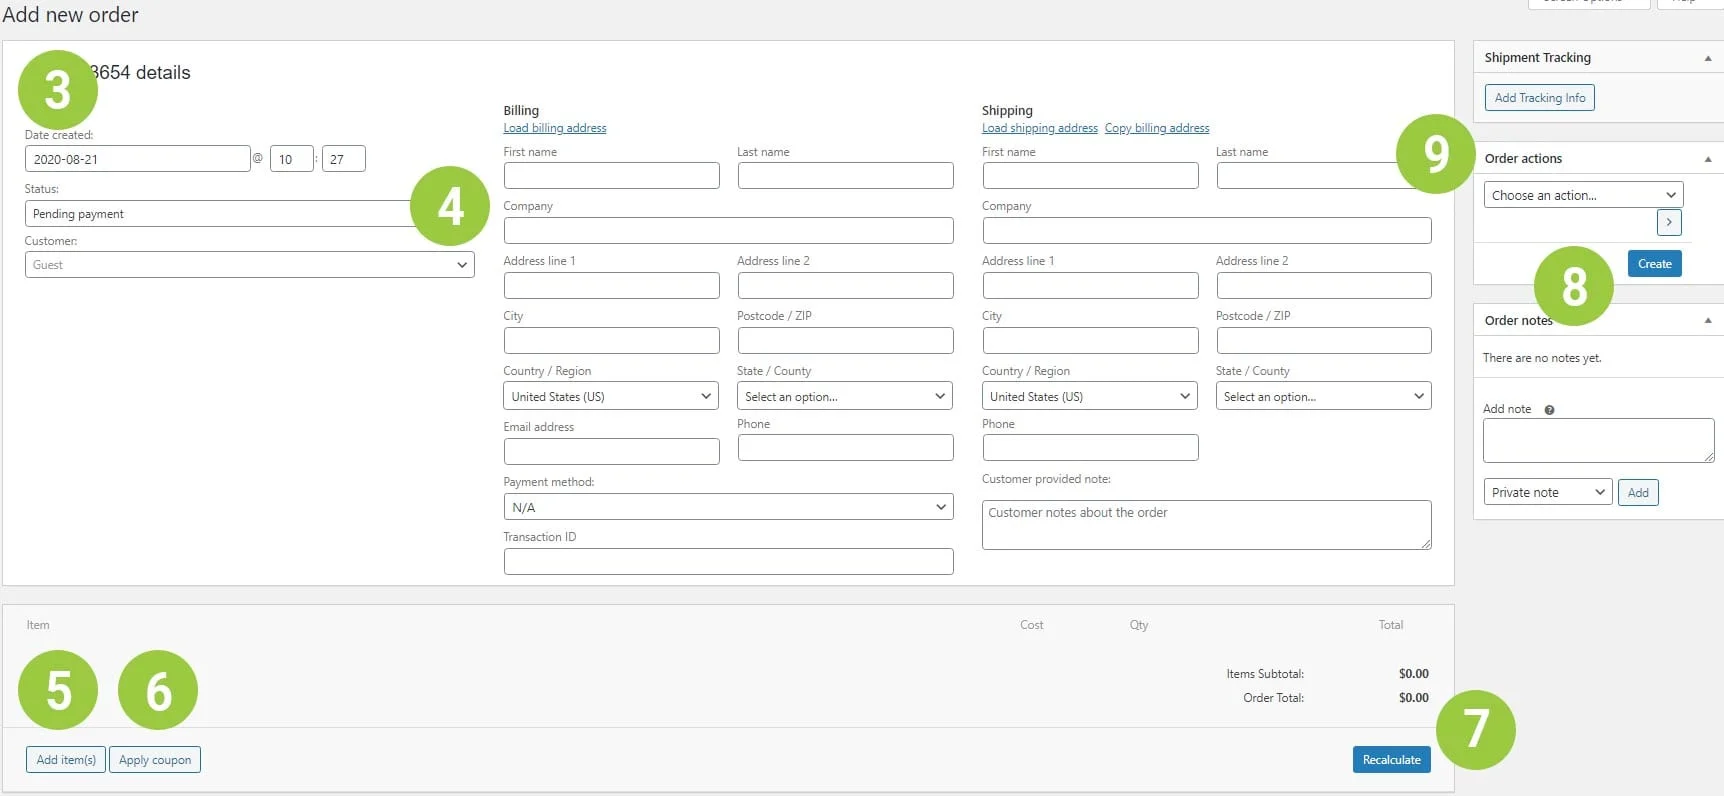
To add a note:
When a payment fails on an order, you will receive a “Failed Order” email and the order will be marked as “Failed” on the WooCommerce orders page.
If you click to view the failed order, in the Order Notes section, you may see a purple note from your payment gateway about why the order failed. It might say “Card was declined” or something of the like.
You can send this link to your customer in the order note, or you can give them a call and enter their credit card information over the phone if you prefer.
Customer Note Example:
Hello [Customer Name],
Thanks for your recent order! The credit card you used for payment has failed to go through. <a href=”paste Customer Order Page URL BETWEEN these quotation marks “> Click here to repay on your customer order page.</a>
Thanks for your business!
[Your Name]
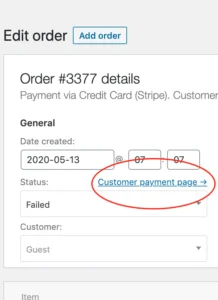
Orders that are “Pending payment” or “failed” can be paid for through the payment link.
Customer Payment Page Link: From the order page, you can access a unique URL where your customer can pay for their order again, without needing to resubmit their whole order. To find this link, click “Customer Payment Page →” right above the order status near the top of the page.
This will open up a page with the order summary, and credit card fields so the customer can reenter their payment method. The URL will look something like: https://yourdomain.com/checkout/order-pay/3377?pay_for_order=true&key=wc_order_ofn8Mm9JiSZ9P
You can send this link to your customer in the order note, or you can give them a call and enter their credit card information over the phone if you prefer.
In most circumstances we will cover this process with you individually when your ecommerce store goes live to make sure all of your needs are covered. All businesses will fulfill their orders in a different manner, but here is a general guideline on the steps to take.
*This is a free add-on feature for your ecommerce store. If your store does not yet include this feature, please contact our team to get it added.
Note: Measure and weigh packages carefully, and choose the correct service when using USPS-provided packaging. The USPS automatically assesses all packages and bills your credit card for those with insufficient postage. For more information, see Understanding the US Postal Service’s Automated Package
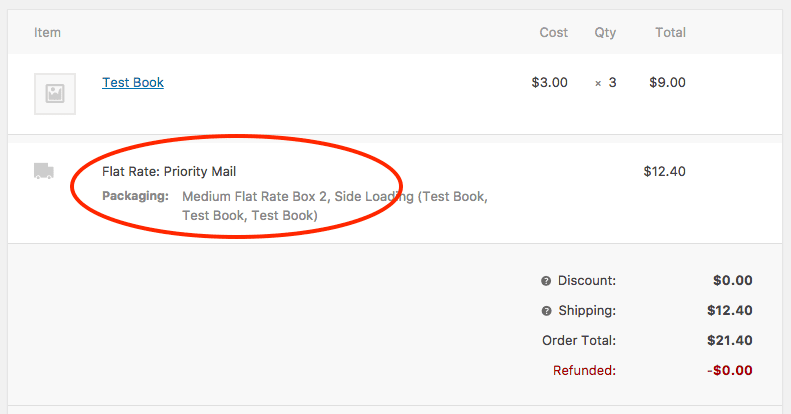
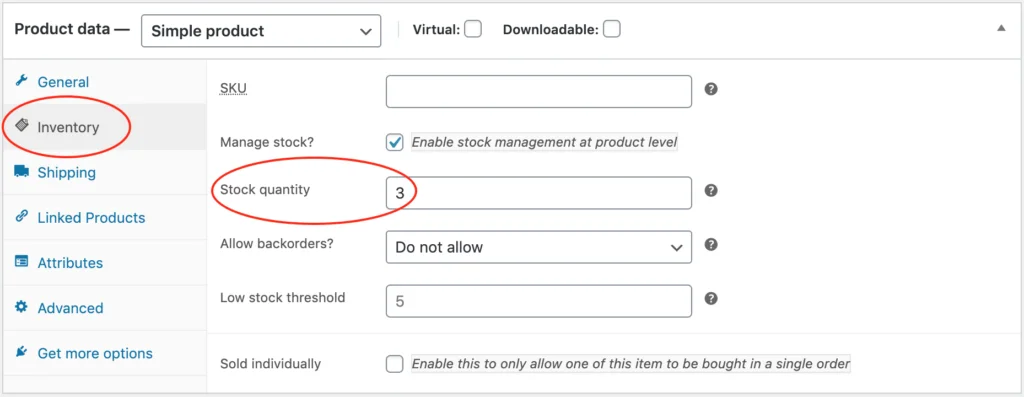
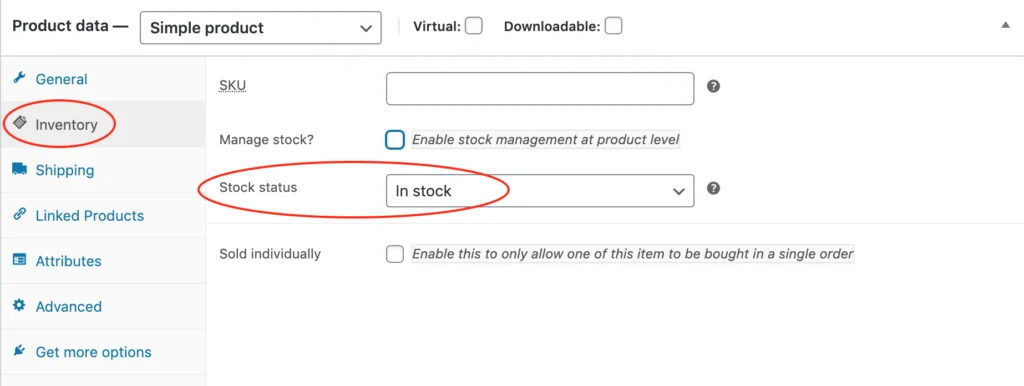
In order to get accurate shipping rates & shipping labels, weight/dimensions need to be provided for all products.
Generating USPS Shipping Labels

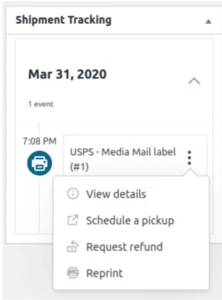
Reprinting Shipping Label or Requesting A Refund
Lost your shipping label? Don’t need a shipping label any more? Reprint or request a shipping label by expanding the ellipsis menu to access these options.
In order to get accurate shipping rates & shipping labels, weight/dimensions need to be provided for all products.
To print FedEx shipping labels:

Simple Products: covers the vast majority of any products you may sell. Simple products are shipped and have no options to choose from. For example, a book.
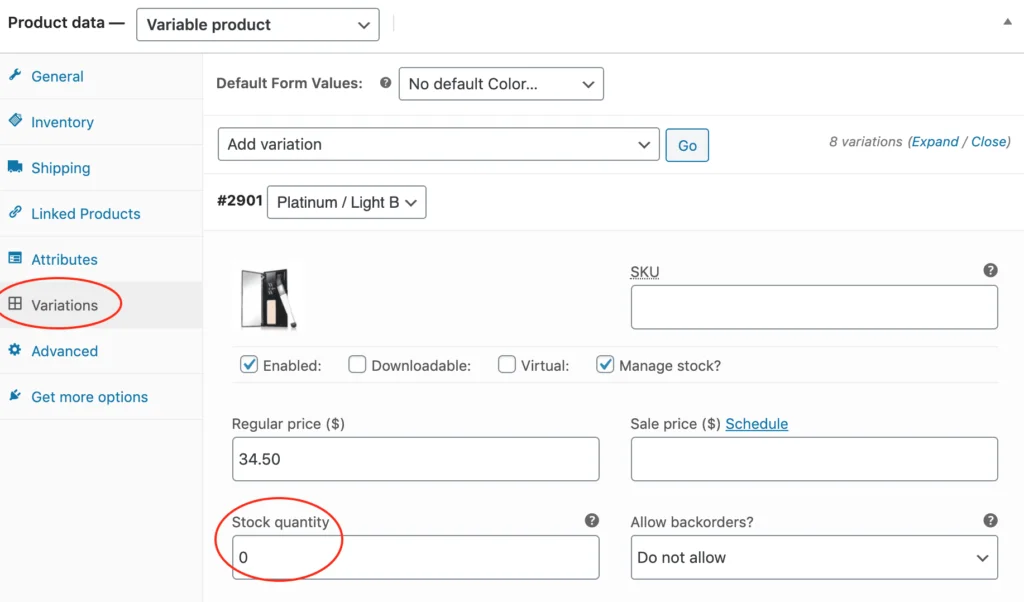
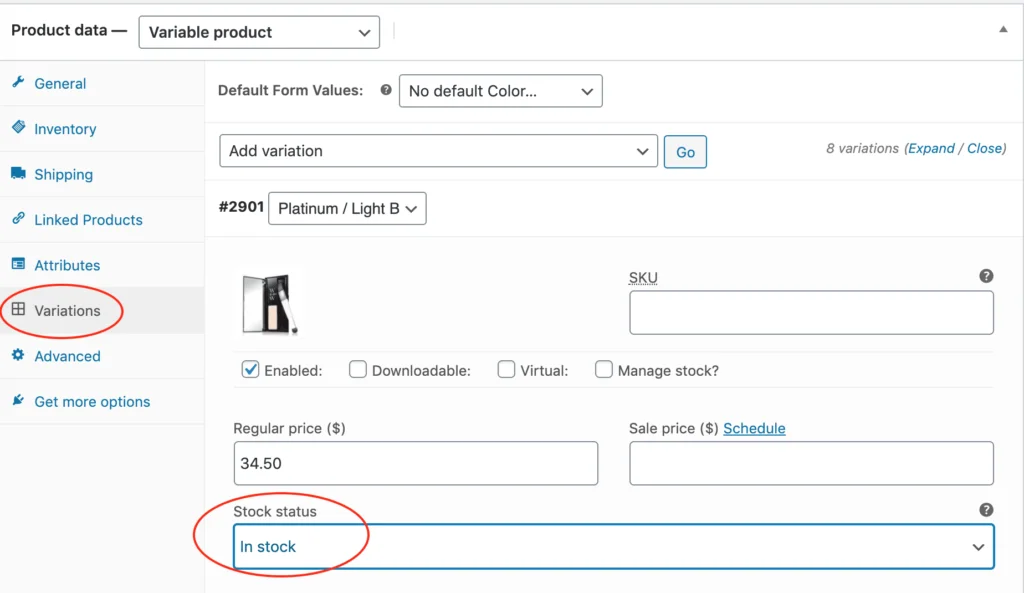
Variable Products: a product with variations, each of which may have a different SKU, price, stock option, etc. For example, a t-shirt available in different colors and/or sizes.
You’ll notice that for variable products, most of the settings below will be set per variation.
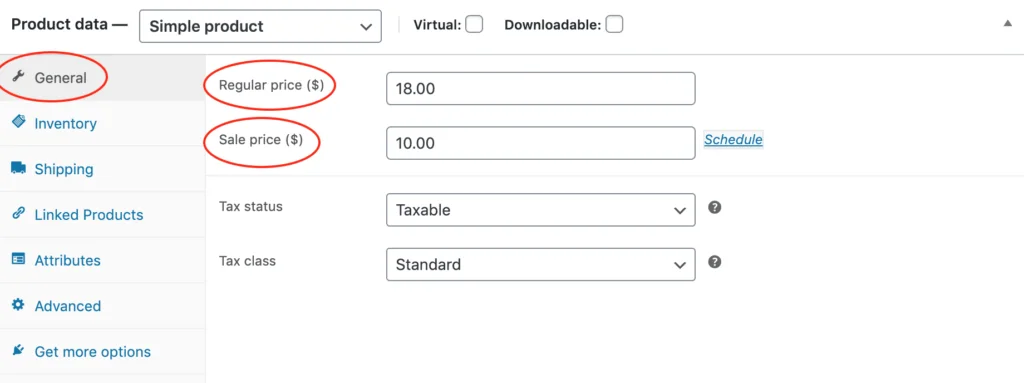
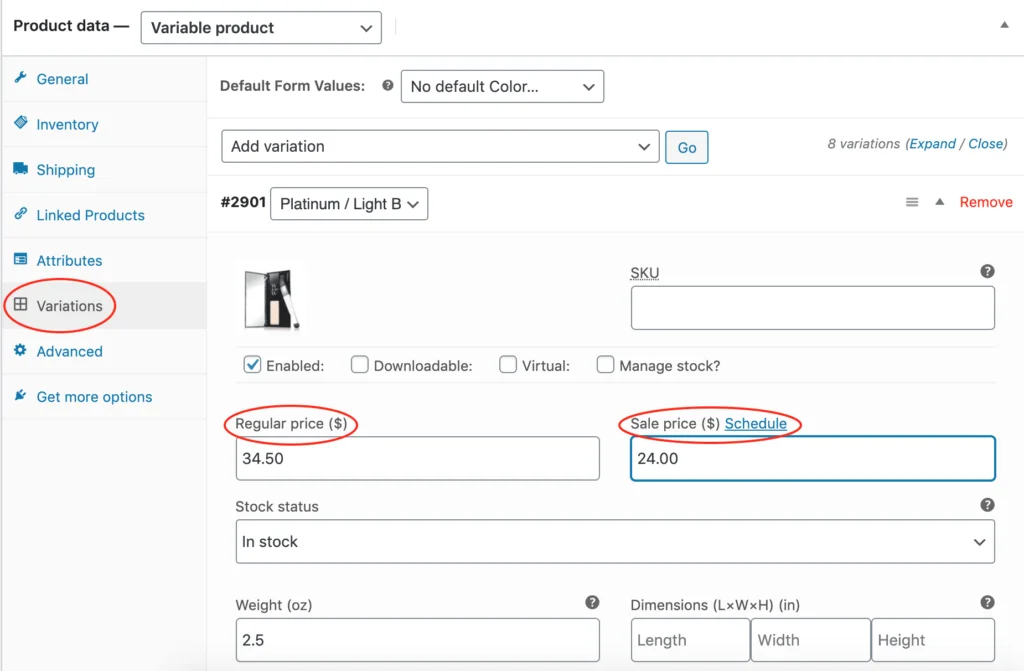
Sale prices in your store will be displayed with a “SALE” badge on your product image, and the original price will be crossed out next to the sale price.
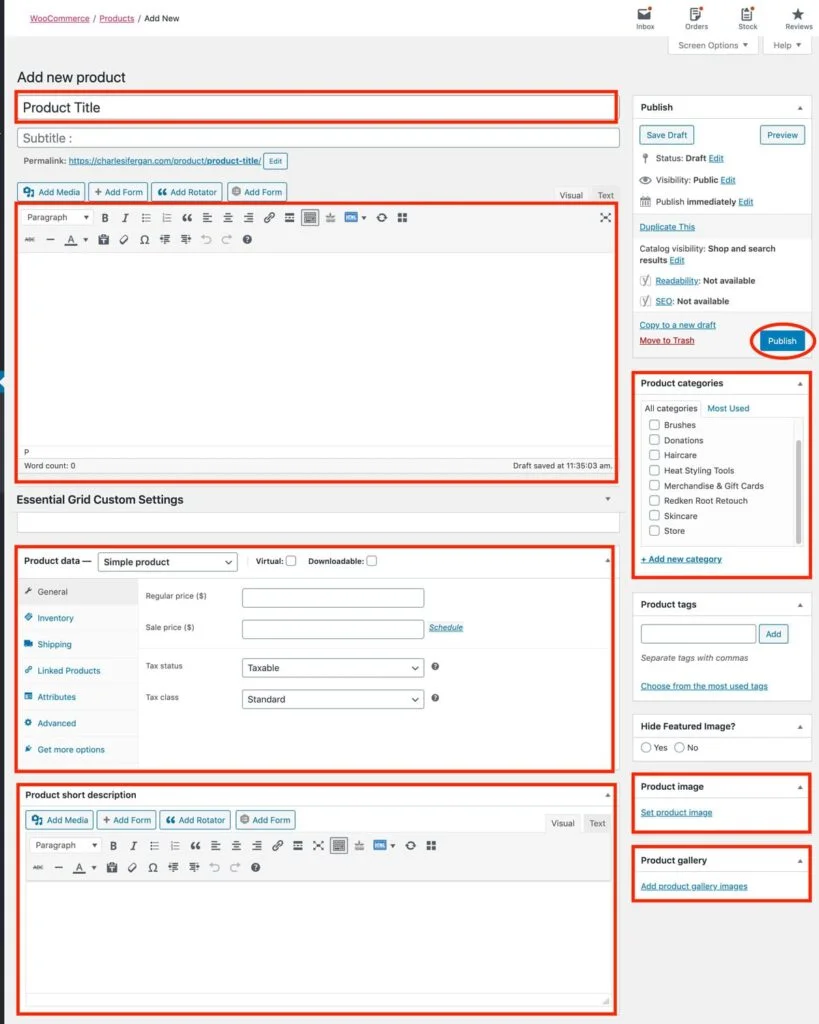
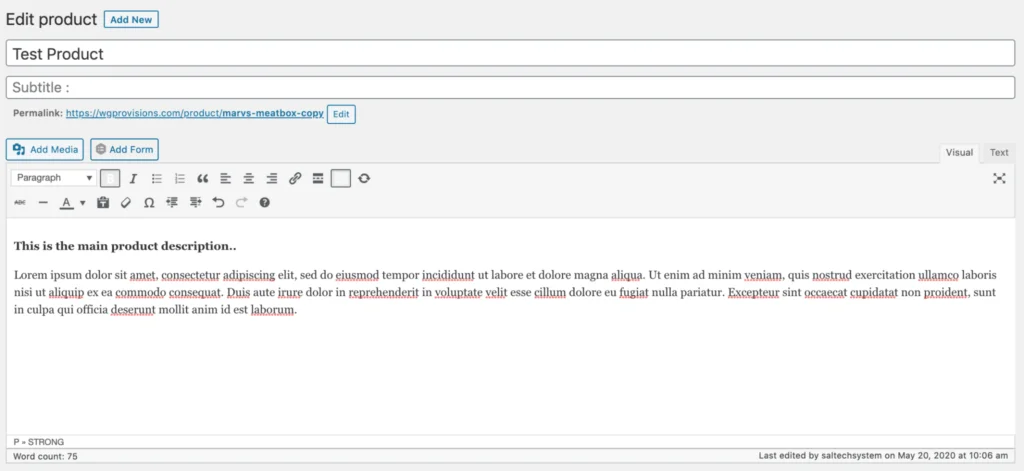
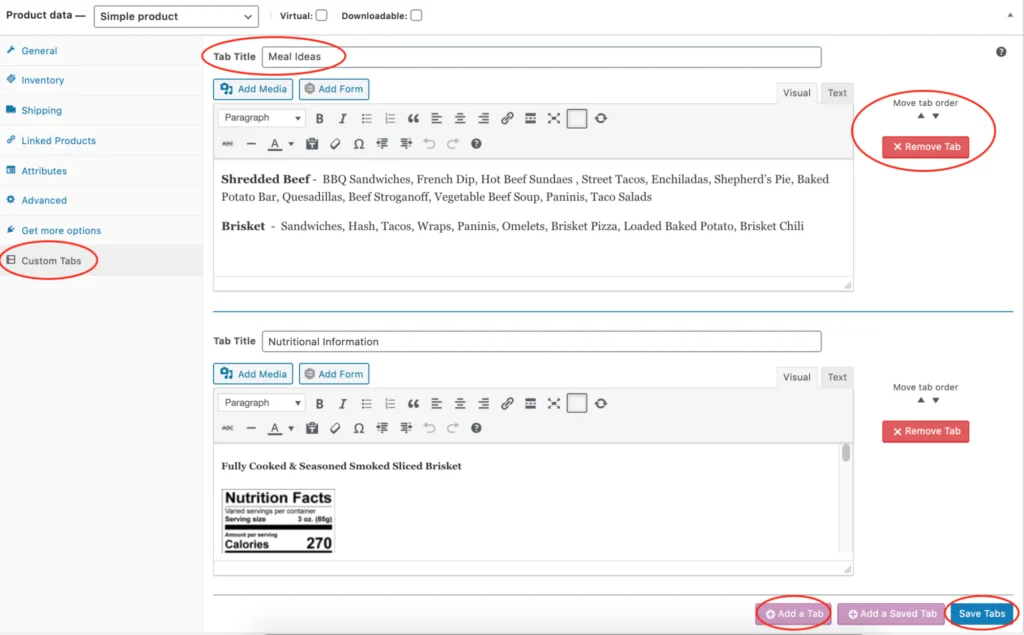
Product descriptions & information can be located in 3 different places on your product.

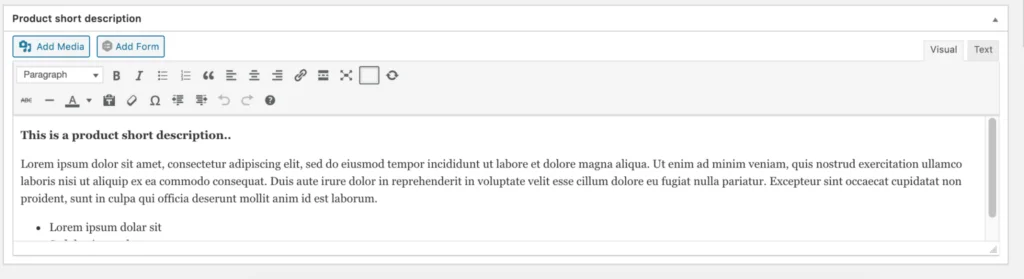
Short Description: Is displayed on the right side of the product page, above the “add to cart” button.
Main Product Description: This is displayed in the Description tab, below the product images.
Custom Tabs: Your online store might also use “Custom Tabs” to display & organize even more information in additional tabs below the product image. Custom tabs can contain almost anything you need – product specifications, instructions, and more!
This is an add-on feature so if you would like to add custom tabs to your store, just let us know!
The easiest way to add a new product is to duplicate an existing product that is similar to your new product.
Below is a quick overview of add/edit product page: