WordPress is a publishing software that is used to create websites. Since it was established in 2003, WordPress has become one of the most popular website platforms, powering 35% of the internet! WordPress powers websites for a wide range of businesses from small hobby blogs to large companies like Microsoft, Best Buy and Walt Disney.
One of the primary benefits of using WordPress for your company’s website is that it is easy to learn and use – no coding knowledge is required to make basic content updates to your website. WordPress is also extremely customizable and has virtually endless functionalities that we can implement on your website.

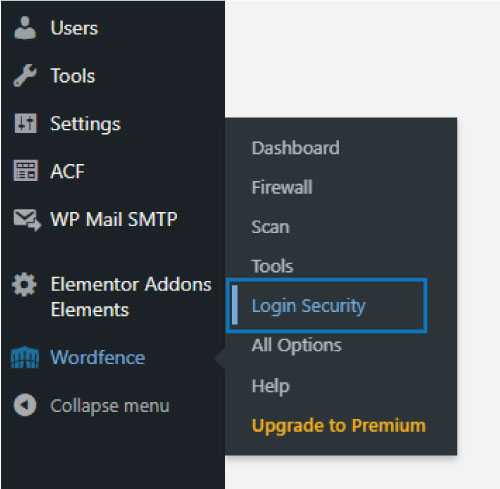


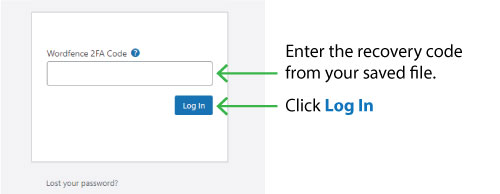
If you ever need more recovery codes, you can generate more in the Wordfence Login Security screen.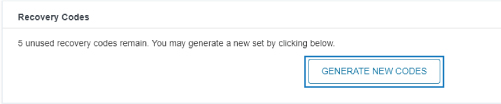
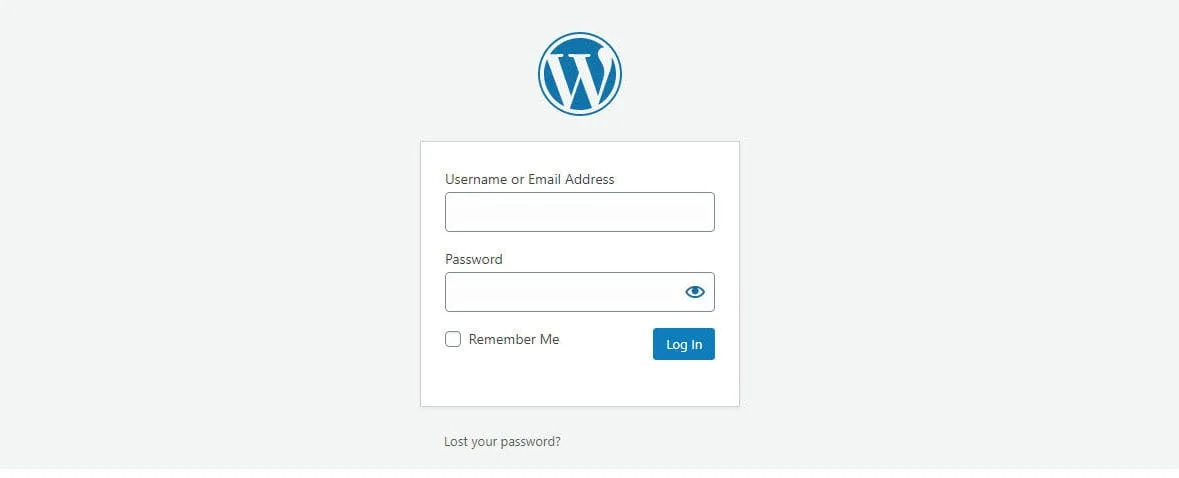
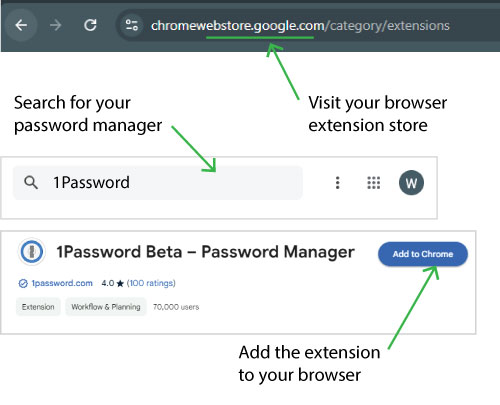
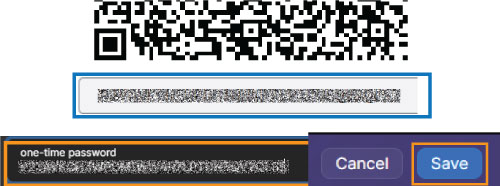
Download Your Preferred Password Manager. Sign up for one of the password managers from the list below. If you already use a password manager, make sure it supports Time-Based One-Time Passwords (TOTP). In this guide we’ll use 1Password as an example.
List of Password Managers:
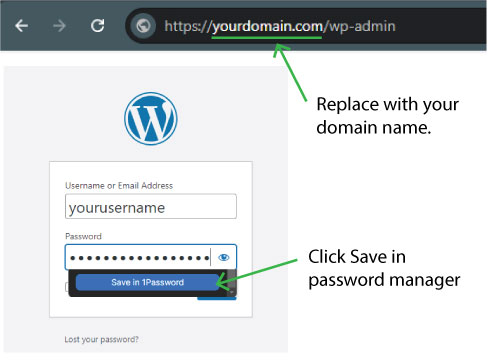
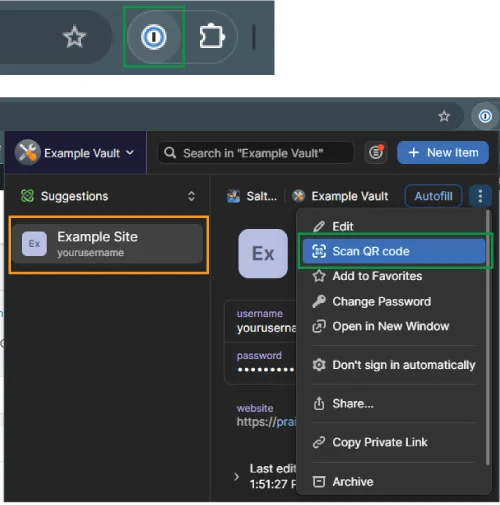
Using a Browser Extension to activate 2FA:
With 1Password, you can add a note to your site details and paste these codes there. Click save in the top right corner.
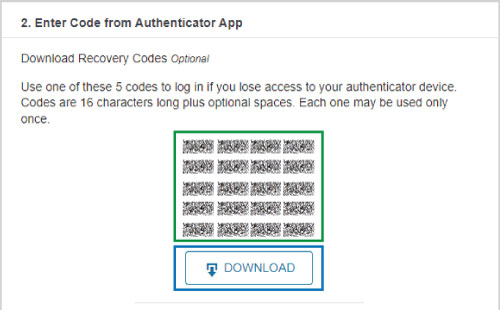
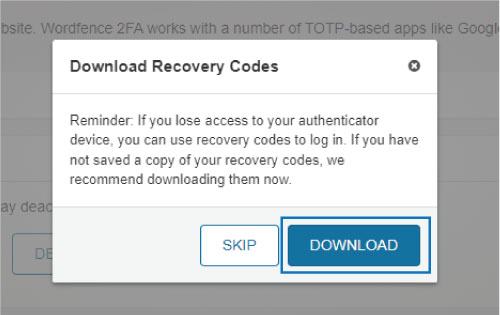
Alternatively, you can download your recovery codes and save the file in a safe place.
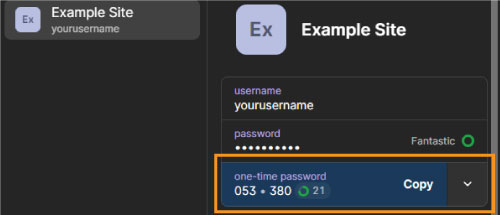
Using your Password Manager without a Browser Extension:

With 1Password, you can add a note to your site details and paste these codes there. Click save in the top right corner.

Alternatively, you can download your recovery codes and save the file in a safe place.

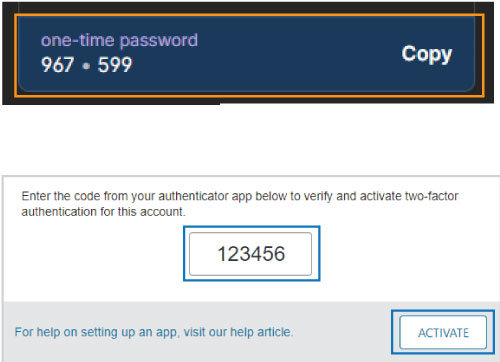
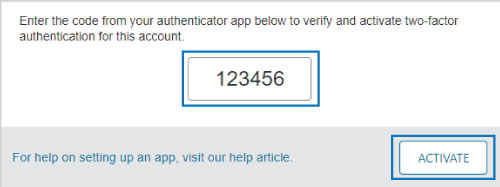
Successful 2FA Activation & Testing 2FA.
If you ever need more recovery codes, you can generate more in the Wordfence Login Security screen.
If you are running into issues using your 2FA code, you can try some of the troubleshooting steps below.
We optimize your website to perform well in search results by following SEO best practices when building your website. We optimize technical things such as:
However, these technical things are only a very small part of ranking well in search engines. The most important thing is to have really good, relevant content. Building your page ranking takes time, among other efforts! Contact our team, our marketing experts offer advanced SEO & digital marketing services to help your website traffic grow!
We use caching software on your website which helps to speed up the load time of your website. This helps retain users and improve your SEO rankings. Due to caching, some changes may not immediately appear on the front-end of your website.
Clearing your website cache fixes this issue about 90% of the time! To clear your cache: or
or 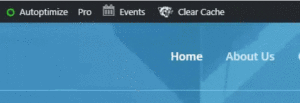
If you still aren’t seeing changes, try clearing your browsers cache by pressing [Ctrl], [Shift] and [Del] on your keyboard. You can also try viewing the website in a different browser, or in a private browser. If you still aren’t seeing changes feel free to contact our team!
Our team would be happy to help add new content and features to your website. Whether you want to simply add a new page, or do something more advanced like a custom form, online store, membership features, or any other ideas that you have, just contact our team to get started!